Cloud Router
Table of Contents
Act 1: Finding a New ISP #
Internet speeds in the UK tend to be rather abysmal for their asking price.
I’m currently buying an internet connection from Plusnet who are charging me ~£20/m for a 36Mb/s down, 10Mb/s up connection (with landline). They also charged me a small, one time setup fee (a few quid) for a static IPv4 address which I’ve been happily using for a while now. This is all provided over my copper phone line (very old).
Self-hosting somehow survives these speeds just fine for the websites and such that I run, but I’ve been eyeing up a faster connection for some time now to improve my file transferring capabilities. Unfortunately there is a speed limit on copper wires of 80Mb/s down, 20Mb/s up and that’s in the best case scenario. So my dreams of Gigabit internet are going to require a bit more effort.
Let’s aim for that “Gigabit internet” target and see what we can find (ignoring contract length and setup fees):
| ISP | Down/Up Mb/s | Cost/Month |
|---|---|---|
| Virgin Media | 1130/104 | £45 |
| BT | 900/110 | £43 |
| Plusnet | 900/115 | £50 |
| Sky | 900/100 | £58 |
| Community Fibre | 920/920 | £25 |
“Do you see the odd one out?” - Dora the Explorer.
Clearly Community Fibre woke up and chose violence. Not only do they have the second-highest average down speed, they also boast a symmetric upload speed. All for half the price of the other offerings.
“Yeah that’s great but what’s the catch?” is what you’re probably asking right about now. I asked it too.
Carrier-Grade Network Address Translation (CGNAT) #
CGNAT is the ISP’s solution to dwindling IPv4 address space. Let’s break it down:
Network Address Translation (NAT) is the protocol that allows one public IPv4 address to be used by multiple devices, each with it’s own private IPv4 address. Generally, an ISP will hand your router/gateway a public IPv4 address and your router will give each device that connects to it a private one. Then as outgoing packets pass through the router, return addresses are switched from private ones to the public one and vice versa for the responses. It’s all very clever, and I suggest learning more about it; Perhaps I’ll go into more detail in a future post.
So what makes it Carrier-Grade? At it’s core, CGNAT is just a second layer of NAT. Where your home router may use the usual private IPs such as 192.168.0.0/16 or 10.0.0.0/8, CGNAT has the 100.0.0.0/8 range assigned to it. So it looks something like this:
Rather convoluted if you ask me!
Now the problem with this is that we don’t have control over the ISP router that’s performing CGNAT, so we have no way of port forwarding. That means no self-hosting 😢.
Act 2: A Challenger Approaches #
Since we’re saving so much on our internet connection, what’s stopping us from spending a little money on implementing an equally convoluted way of getting around CGNAT?
If we add our own NAT gateway (router) in a public cloud, it will have a public static IPv4 address, a public static IPv6 address, and likely a fast internet connection too. We can then set up a Wireguard tunnel from our local server to that cloud router. We then forward all our packets via the new Cloud Router at which point we have essentially given our server a public static IPv4 address again!
Confused? Yeah me too, so I made a diagram:
Physically, the Wireguard tunnel (10.69.69.0/24) goes over our existing CGNAT connection but logically, the CGNAT connection is abstracted away and isn’t something we need to worry about just yet.
Finding a VPS #
We’ll need something to act as our Cloud Router, so I’ve compiled a list of some various VPS options below. Each assumes that savings plans (or equivalent) have been applied up to 1 year in duration, excluding any upfront payments. I’ve also gone for the smallest VPS from each provider as we barely need any raw power.
| Cloud | vCPU | RAM (GiB) | Disk (GB) | Data Transfer (GB) | Network Speed (Gb/s) | Monthly Cost ($) | Cost Calculator Link (or equivalent) |
|---|---|---|---|---|---|---|---|
| AWS | 2.0 | 0.5 | 8 | 25 | < 5.0 | 8.83 | Link (New Elastic IP charge considered) |
| GCP | 0.25 | 1.0 | 10 | 200 | 1.0 | 5.44 | Link |
| Azure | 1.0 | 0.75 | 8 | 100 | < 6.25 | 4.74 | Link |
| Oracle Cloud | 4.0 (ARM) | 24.0 | 200 | 10 000 | 4.0 | 0.00 | Link |
| Oracle Cloud | 2.0 | 1.0 | 200 | 10 000 | 0.48 | 0.00 | Link |
| Linode | 1.0 | 1.0 | 25 | 1000 | 1.0 | 5.00 | Link |
I see 3 potential solutions here in my personal order of preference:
- Oracle for having a ludicrous free tier including both ARM and x86 machines with 10TB of egress.
- Linode for their apparent lack of immediately obvious problems and their extra features (which I’ll explain soon).
- Azure for simply being the cheapest on the board. A potential worry here is hitting the 100GB free data transfer limit in one month. (Azure also gets no points for their calculator, it’s slow).
AWS appears far too expensive for this use case. However, it wasn’t the compute, the transfer cost is what’s stinging us.
AWS loses in this battle because they don’t offer some free transfer every month. Egress transfer costs are expensive across the board beyond free amounts so if you’re looking to do multiple TB per month, Oracle is your choice.
GCP doesn’t make the cut due to their high vCPU price, perhaps they have extremely fast CPUs, but I’ve not dug into it so for now… we’ll leave them be.
Linode’s “Extra Features” #
Since we’re making a Cloud Router, wouldn’t it be nice if we could do some IPv6 routing? Linode is the only provider (from what I can tell) that allows us to assign a prefix larger than a /64 to our VPS. This means we can have it run SLAAC with RA and assign downstream clients public static IPv6 addresses.
If instead of putting the Wireguard endpoint on our server, we could put it on our usual router, and it would almost act as just another WAN connection!
Another nicety of Linode is the easy setup of Reverse DNS (PTR) records for our v4 IP. They have this functionality built into their management console, unlike Oracle. This is important if you host an email server like I do.
Choose Your Fighter #
We’ll go with Oracle for now since:
- It’s free.
- I don’t particularly need a public static IPv6 address for everything at the moment.
- They still do offer RDNS via a support request.
A quick aside; Oracle Cloud’s free tier is actually so good that I feel obligated to urge you to forego this convoluted setup and just host your stuff in their cloud directly.
Act 3: Implementation #
I won’t be mad if you skipped to this, I’ve been known to waffle.
Let’s take an inventory of what we’ll need:
- A Wireguard “server” on the VPS since it’s the only thing with a public IP.
- A set of iptables rules to forward traffic correctly on the VPS.
- A Wireguard “client” on our local server.
- A set of iptables rules to route traffic back over the Wireguard tunnel.
VPS #
Once you’ve signed up for a free Oracle Cloud account, use the search in the management console to find the following sections.
Virtual Cloud Network (VCN) #
-
Create a VCN with a private IPv4 CIDR of something like
10.0.16.0/24. -
Add an Internet Gateway to your VCN.
-
Edit the default route table in your VCN, adding a route rule pointing to your previously added internet gateway. It should have a destination CIDR block of
0.0.0.0/0since we want to route internet-bound traffic over the internet gateway (i.e. it will act as our default route). -
Edit the default security list for your VCN so that it has the following entries:
| Source | Protocol | Destination Port | Explanation |
|---|---|---|---|
| 0.0.0.0/0 | TCP | 22 | For SSH-ing into the cloud router before we reconfigure it |
| 0.0.0.0/0 | TCP | 2222 | For SSH-ing into the cloud router once we’ve reconfigured it |
| 0.0.0.0/0 | TCP | 51820 | For Wireguard |
If you were particularly paranoid, you could lock down the Wireguard one to only allow Source IPs from your ISP’s CGNAT CIDRs.
There are 2 ICMP rules, you can either ignore these or delete them and add your own that allows all ICMP traffic. This may come in handy for troubleshooting.
- Create a subnet with the same IPv4 CIDR as the VCN (
10.0.16.0/24), use the default route table, make it public, and use the default security list.
Reserved Public IP #
Reserve a public IP from Oracle
Instance #
-
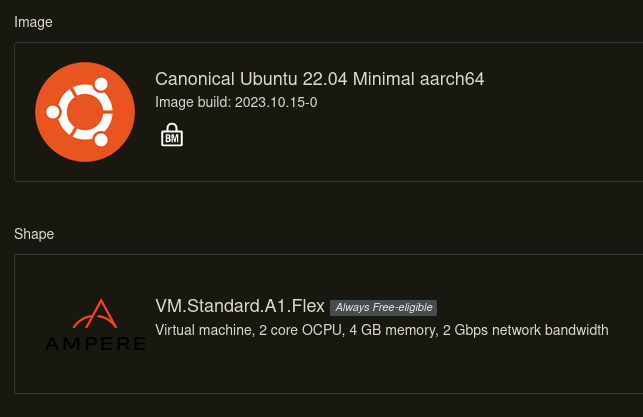
Pick Ubuntu as your operating system (if you want to use an ARM instance, pick the aarch64 image).
-
Change the shape to the specs you want, the minimums for any architecture are fine. I’ll pick an ARM based instance with 2 vCPUs and 4 GB of RAM.
This is what the Image and Shape section should look like if you’re following this article to the letter:
-
Under “Primary VNIC information” ensure it’s using all the relevant entities from the VCN that we just configured. The “auto assign public IPv4 address” box should be checked.
-
Add your SSH public key.
-
Now you can press create.
-
Once the instance has spun up, you can connect to it over ssh, something like
ssh ubuntu@<Public IP>. -
Then run the following commands on the cloud router:
apt install && apt upgrade -y # ignore the service restarts for now
apt install -y wireguard # ignore the service restarts for now
cp /etc/iptables/rules.v4 /etc/iptables/rules.v4.orig # take a copy of the original iptables rules just in case
sed -i "/icmp-host-prohibited/d" /etc/iptables/rules.v4 # Remove the Oracle REJECT rules from INPUT and FORWARD
iptables-restore < /etc/iptables/rules.v4 # load the updated iptables rules
reboot
- Once the machine has rebooted, reconnect and run the following commands:
cp /etc/ssh/sshd_config /etc/ssh/sshd_config.orig # take a copy of the original sshd_config just in case
sed -i "s/#Port 22/Port 2222/" /etc/ssh/sshd_config # Change the port that sshd listens on to 2222
From now until the next step do NOT disconnect from the session until you have tested your ability to ssh back in from a NEW shell. If you can’t SSH into your cloud router after this, terminate it and go back to step 1.
systemctl reload sshd # reload the sshd config (now listens on 2222)
Now in a new terminal, ssh into the machine using the new port:
ssh -p 2222 ubuntu@<Public IP>
If this works, you’re safe, otherwise check/undo the previous changes and try again.
- Now we can get onto Wireguard. Let’s create some keys:
wg genkey | tee server.priv
wg pubkey < server.priv | tee server.pub
wg genkey | tee client.priv
wg pubkey < client.priv | tee client.pub
- Now we create
/etc/wireguard/wg0.confon the cloud router with the following contents:
[Interface]
Address = 10.0.17.1/30 # Any CIDR that doesn't overlap with the VCN's CIDR or anything in your home network
ListenPort = 51820
PrivateKey = # contents of server.priv goes here

# Allow the router to forward packets
PreUp = sysctl net.ipv4.ip_forward=1

# Immediately accept connections on 2222 so we can still SSH into the cloud router
PreUp = iptables -t nat -A PREROUTING -i ens3 -p tcp --dport 2222 -j ACCEPT
PostDown = iptables -t nat -D PREROUTING -i ens3 -p tcp --dport 2222 -j ACCEPT

# Destination NAT all other TCP traffic to our local server at 10.0.17.2
PreUp = iptables -t nat -A PREROUTING -i ens3 -p tcp -j DNAT --to-destination 10.0.17.2
PostDown = iptables -t nat -D PREROUTING -i ens3 -p tcp -j DNAT --to-destination 10.0.17.2

[Peer]
PublicKey = # contents of client.pub goes here
AllowedIPs = 10.0.17.2/32
You’ll need to replace the ens3 interface name; you can check yours by doing an ip link show and looking for the first one beginning with “e”. It may look something like enp0s12.
- Start the Wireguard server:
chown root:root /etc/wireguard/wg0.conf
chmod go= /etc/wireguard/wg0.conf
systemctl enable --now wg-quick@wg0
Ensure everything worked nicely using:
systemctl status wg-quick@wg0
Local Server #
Now we’ll setup something very similar on our local server, it should be a bit simpler since we have most of what we need now.
-
SSH into your local server.
-
Install wireguard/wireguard-tools depending on your distribution.
-
Create the client Wireguard config
/etc/wireguard/wg0.conf:
[Interface]
Address = 10.0.17.2/30
PrivateKey = # client.priv goes here (the one we generated on the cloud router)

Table = 123 # Use a new routing table just for wireguard stuff

# Mark all connections originating from the wireguard interface
PreUp = iptables -t mangle -A PREROUTING -i wg0 -m state --state NEW -j CONNMARK --set-mark 1
PostDown = iptables -t mangle -D PREROUTING -i wg0 -m state --state NEW -j CONNMARK --set-mark 1

# Mark all packets originating anywhere except the wireguard interface that match the connection mark from above
PreUp = iptables -t mangle -A PREROUTING ! -i wg0 -m connmark --mark 1 -j MARK --set-mark 1
PostDown = iptables -t mangle -D PREROUTING ! -i wg0 -m connmark --mark 1 -j MARK --set-mark 1

# Route all packets with the mark using the new table
PreUp = ip rule add fwmark 1 table 123 priority 456
PostDown = ip rule del fwmark 1 table 123 priority 456

# Route any responses that originally came to the wireguard interface back over it
PreUp = ip rule add from 10.0.17.2 table 123 priority 456
PostDown = ip rule del from 10.0.17.2 table 123 priority 456

[Peer]
PublicKey = # server.pub goes here (the one we generated on the cloud router)

AllowedIPs = 0.0.0.0/0
Endpoint = <Cloud Router Public IP>:51820

# Ensure the connection doesn't die so we can always receive new connections from the cloud router
PersistentKeepalive = 30
- And start it:
chown root:root /etc/wireguard/wg0.conf
chmod go= /etc/wireguard/wg0.conf
systemctl enable --now wg-quick@wg0
- Again, check the status with:
systemctl status wg-quick@wg0
Act 4: Testing #
If everything has gone well, we should have a working cloud router now!
SSH #
The best way to check this now is to SSH into your local server using the public IP of the cloud router, so:
ssh localServerUser@<Cloud Router Public IP>
Let’s go through what’s happening when we execute this command:
- Packet from the initiator (in this case you) comes into the cloud router from the internet.
- The packet gets checked by the iptables rules in the NAT table, and it matches the second rule (
iptables -t nat -A PREROUTING -i ens3 -p tcp -j DNAT --to-destination 10.0.17.2). - That same rule changes the destination address to that of the local server (over the wireguard connection).
- The cloud router forwards the packet to the local server.
- The local server receives the packet and marks the connection before handling the packet.
- The local server generates a response on the connection and begins to send it back out.
- The local server marks the packet since the connection was already marked.
- The local server sends the response packet back over the Wireguard connection to the cloud router.
- The cloud router receives the packet and forwards it out back over the internet to the initiator (you).
In this case, the connection/packet marking isn’t needed as the response packet’s from address is that of the Wireguard interface, so we just use that information to route it correctly.
The marking comes into play when you use (for example) docker to run the actual service… a web server or something.
Web Server #
Speaking of web servers, let’s set one up:
-
Add a rule in the Security List in your Oracle VCN for port
80from0.0.0.0/0. -
Install docker on your local server and run the following command to start a basic web server:
docker run --rm -it -p 80:80 nginx
- Using a browser, go to
http://<Cloud Router Public IP>and you should see the default Nginx landing page.
A similar process can be employed to expose whatever service you want to.
Act 5: Conclusion #
Hopefully this has worked out alright for you and helped you circumvent your CGNAT (or equivalent) situation. It’s working beautifully for me so far. If you have any questions, you can find me on Twitter (X).
I wouldn’t have been able to write this article without the help of Justin Ludwig and his 2 articles WireGuard Port Forwarding From the Internet and WireGuard Port Forwarding From the Internet to Other Networks. His graphics are much cooler than mine, so if something doesn’t make sense here, his will.